Thursday, January 5, 2012

Thin Thursday~ Scrambled Egg Whites

Happy New Year!! So, your New Year's resolution is to exercise more frequently, right? Now you're exercising, enduring the pain and the soreness, but you're not losing weight, right? That's because, unfortunately, exercise alone is most certainly not enough. You must must MUST change your diet if you expect to see results. When I seriously got serious about losing weight, not only did I begin exercising on a regular basis, but I also realized and accepted that I needed to make a lifestyle change with the way I eat. The way I think about it is like that saying "you get what you give". If you put lean healthy food in your body, you will be lean and healthy. If you put fatty foods & foods with no nutrition in your body, well, you see where this is going, and it's not pretty, people.

I am going to share simple and cheap meal substitutions that I use on a daily basis and will help you lose weight and keep it off forrr-eeeee-verrrr (insert voice from "The Sandlot" here). These are all changes I've made to my diet and they are what worked for me when I lost a bunch of weight and got healthy. And who doesn't want to do that?? Seriously, raise your hand if you don't.

Today I am sharing my favorite everyday breakfast~ Scrambled egg whites with almonds. Here is a little 411 on eggs for ya to think about: The average egg yolk has approximately 240mg of cholesterol. You know cholesterol is that stuff that builds up in your blood vessels, leading to all sorts of problems. The recommended daily allowance for the average person of cholesterol is no more than 300mg. Yikes! That means if you have 3 whole eggs for breakfast, you are eating 2 1/2 days worth of your daily allowance of cholesterol. The egg white has zero cholesterol, which is why we eliminate the yolk.

Some may argue that there are nutritional benefits to the yolk. There are 3g of protein in the white and 3g of protein in the yolk. That protein and the rest of the nutrients in the yolk can easily be gained from somewhere else, and the high amount of cholesterol doesn't it make it worth eating the entire egg.

Eating a diet high in protein is necessary to build muscle, and building muscle is what helps you burn fat. It also helps you to not be hungry for a longer period of time versus eating a meal that's high in simple carbs that will make you feel tired and hungrier sooner. Egg whites are great because they are lean, high in protein and keep you full for longer. When substituting egg whites for whole eggs in a recipe, two egg whites equals one whole egg.

Luke insisted that we take a picture in all our morning glory before we got started. Don't mind the chocolate from who knows what on his forehead. Hello, world!


Here's what you need:

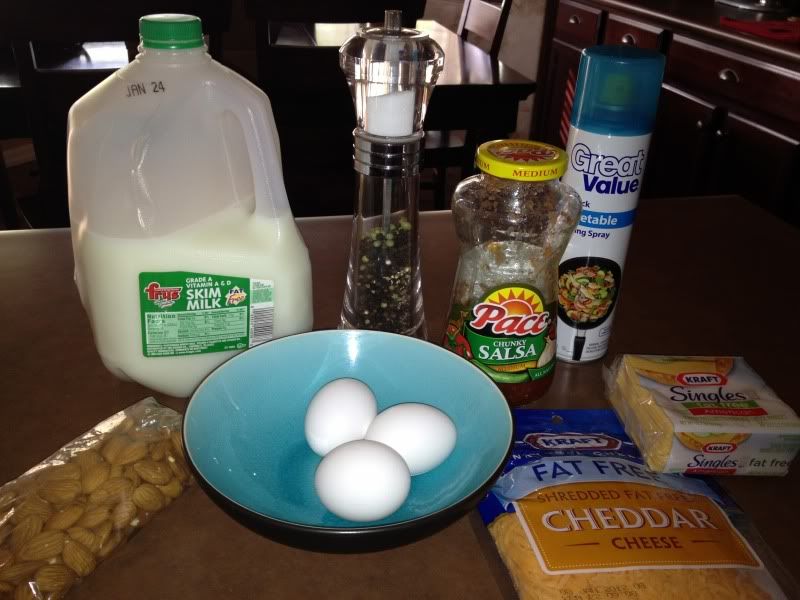
Three egg whites- 120 calories
1oz of skim milk- 10 calories
One slice of fat free cheese or a pinch of shredded cheese- 25 calories
2tbs salsa- 10 calories
Six plain raw (unsalted & not roasted) almonds- 42 calories

Here's what you do:
Spray a small frying pan with non-stick cooking oil and heat on medium- high heat.
Separate the egg whites from the yolks. Put the whites in a cup or bowl and discard the yolk.
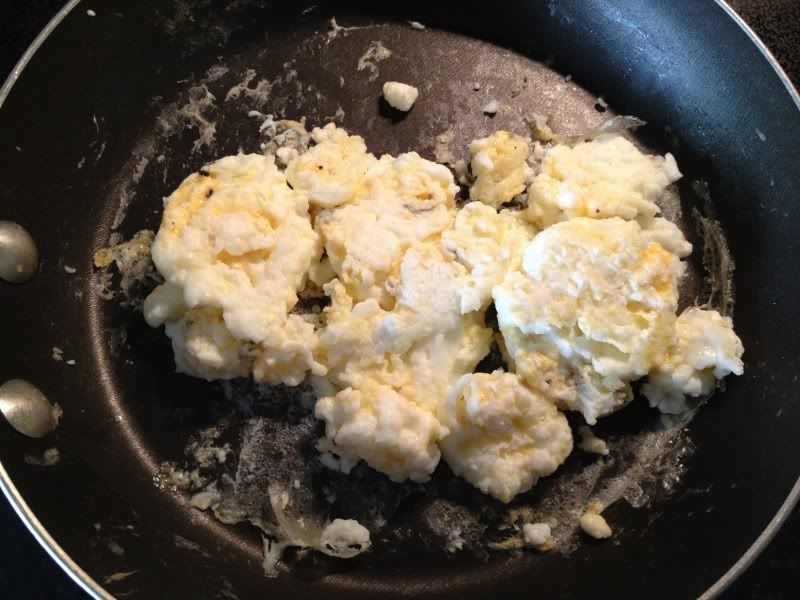
Add the milk and mix. When mixed pour in pan. Add your cheese and pepper. Here's what the consistency should look like:


When the eggs turn white on the bottom, it is time to start stirring and flipping them.


When they are nice and fluffy, and not runny at all, they are done cooking.

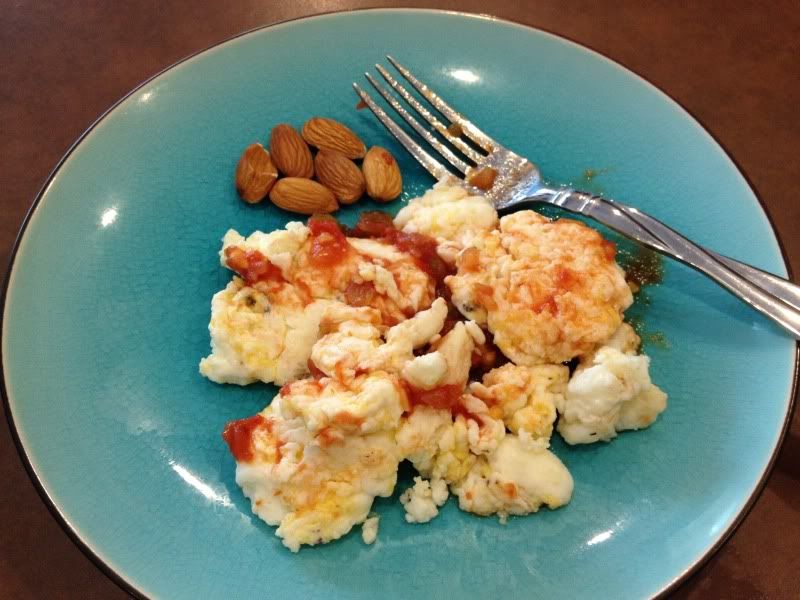
Put the eggs on your plate and add your salsa and almonds, and you are ready to chow!

This meal is so awesome because if you don't have a lot of time in the morning, you can mix everything above and keep in a container in the fridge overnight. That way, all you're doing in the morning is cooking.


{DID YOU KNOW}
CalorieKing is an excellent online resource where you can easily figure out how many calories are in a specific food you are eating.


Have an amazing day!


Friday, December 23, 2011

Best Dang Breakfast Ever~ Santa Fe Crescent Ring

Hey everyone! I have the best darn breakfast recipe to share with you, and you will be thanking me for years to come. I am sharing this recipe just in time for Christmas so that you can wow your friends and family Christmas morning. It is called the Santa Fe Crescent Ring, and it is as close to Heaven as you can come without... well... you know. Anyhow, I found 2 fabulous blogs that featured similar recipes for the crescent ring that I combined and, of course, tweeked to put a healthy, low- fat spin on it. Thank you, Bacon Time with the Hungry Hungry Hypo and Steelmom, for your inspiration for this recipe that was a major hit in my home!

Here's what ya need:
  • 10 egg whites (Remember whenever substituting egg whites for eggs, 2 egg whites = 1 egg)
  • 1 cup of any fat free or reduced fat Mexican blend shredded cheese
  • 1 8oz package of reduced fat crescent rolls (I always get the store brand)
  • 5 slices of Oscar Mayer Fully Cooked Bacon, which I pull all the funky fat off of.
  • 2 slices of tukey breast. Now, we always buy Boar's Head Ovengold turkey from the deli counter and have it sliced sandwich style.
  • 1/3 of a 10oz container of Philadelphia Cooking Creme- Santa Fe Blend. When I reduced Steelmom's recipe, it equaled 1/2 of the container, which I used the first time I made the ring, but it was waaay too rich for my liking. Since you will have leftover cooking creme, you can go the the Philadephia page I linked and use the rest in one of their recipes. 

Now here's what ya do:
  • Preheat your oven to 375 F degrees
  • Scramble up your egg whites on med heat. I always mix my egg whites with about 2 tbs skim milk.
  • While your eggs are cooking, break up the bacon and turkey into little chunks.
  • Put parchment paper on a large cookie sheet and spray parchment paper with non- stick cooking spray. Pull the crescent rolls apart so they are in triangles. Place rolls on parchment paper in a circle so that the points are sticking out and it looks like a sun. The flat parts should overlap a little. I always stretch the crescents out a bit so that they are a little longer than how they come out of the container. Sprinkle 1/3 cup of the shredded cheese around the wide end of the crescent rolls.
  • Once your eggs are done cooking, stir in the turkey, bacon and the Santa Fe Cooking Creme. Mix well.
  • Spoon the egg mixture onto the wide end of the rolls and put 1/3 cup cheese on top of the mixture.
  • Fold the points over the egg mixture and put the remaining cheese on top of the cresent ring.


  • Bake for about 15 minutes, or until the cheese on top is melted and the cresents are a golden brown.
  • Pull that baby out of the oven and enjoy the party in your mouth!


This serves 4 and take about 15 mintutes to prepare, plus your cooking time. You're going to fool everyone into thinking they're having a comfort meal, but you know the real truth. And seriously, if this doesn't make you want to slap your mama, I don't know what will!

Hope you all love this recipe and have a very, very Merry Christmas and happy holidays!!

Much Love,

Wednesday, December 21, 2011

Work It Wednesday

Goooood morning! How are y'all after the 7 Day Run Challenge? Motivated and feeling great, I hope!! Did you keep to your goal? Please share all successes!

I am well aware that the biggest holiday of the year is in 4 very short days, so I am going to make all 5 days of our workout short and sweet. Just like me!

Day 1:
Walking Lunges (Remember, these are essential if you want an amazing money maker, and who doesn't?) Read below to my post titled "Five Days of Hurting so Good" if you want some background on this exercise. This workout will take you 20 minutes to complete and music is vital. I recommend a mix from Rock My Run. You will be pissed at me and you will hate me during the first set, but it gets easier as you go.
50 lunges, rest 60 seconds
40 lunges, rest 60 seconds
30 lunges, rest 60 seconds
20 lunges, rest 60 seconds
10 lunges, rest 60 seconds

Day 2:
Run at least 1.5 miles or walk at least 2 miles. This exercise should take you no longer than 15 minutes if you're running or 30- 45 minutes if you're walking. I'm suggesting a run on day 2 because your butt and legs will feel horrible from your lunges on day 3.

Day 3:
Today we are doing a push up workout that will be 3 sets long with 3 exercises in each set. Now pay attention, because they will each be a little different. This should take you 20 minutes.
Set 1- 20 regular or knee push ups, 20 pike push ups & 20 tricep dips (I use my kitchen table chair)
-No rest, people- keep moving...
Set 2- 15 of each of the above.
-Keep on going- Almost done...
Set 3- 10 of each of the above.
Hallelujah you're done with day 3!
*ps If you're wondering wth a pike push up is, picture this: you have both hands and feet on the ground like a regular push up with your butt straight up in the air so you look like a big A. HAHA! Get it? Bend your elbows and lower your head to the ground, keeping your legs straight the entire time.

Day 4:
Squats~ I began doing this workout when my ankle was broken, so I was only squatting half way down. That is a good starting point if you're not used to doing squats. To begin this exercise, see how many squats you can do in a row to failure. When you figure out that number, repeat 9 more times with a 60 second rest in between each set. If you want to get crazy, do abs during your rest period. Try to do a minimum of 200 squats for your whole workout. This should take about 30 minutes to complete.
*Remember when doing a squat, keep feet shoulder width apart and don't let your knees go forward past your toes.

Day 5:
Do at least 30 minutes of some type of cardio. That could be hiking, running, hot yoga, etc. as long as you keep your heart rate high.

PLEASE leave comments on this post or message with any questions or comments. I want to hear how you're doing and if you want clarification on anything.


Merry Christmas if I don't talk to you before then. I hope you all have a happy and healthy holiday.

{FUN FACT} Did you know...
Exercise boosts brain power, melts stress away, gives you energy, helps ward off disease, pumps up your heart and increases your libido.


Monday, December 19, 2011

Christmas Crafting~ Ornament Chandelier

Hey everyone and thanks for visiting me today! Do y'all ever do this~ 1. Every year around Christmas time I get all these grand ideas for Christmas crafts. 2. I go to the craft store and am shell shocked by the price of seasonal crafting supplies. 3. I go home, sad and disappointed, like a little kid who didn't get everything on his/her Christmas list, and I promise myself I will buy up all these supplies at a 75% off discount so I can do my crafts the following year. 4. THAT HAS NEVER HAPPENED. Usually a couple weeks into January I remember my awesome idea to raid the clearance section, and that is well after the organized women with good memories have bought up all the good stuff!

This year I decided to bite the bullet (not literally thank goodness) and make a craft before Christmas. This was a great craft for a few reasons. 1. I was able to have craft time with my childhood friend, Kara, from Mine for the Making, and 2. if you visit her blog you will see how amazing she is and why I was so lucky to craft with her. 3. We got to watch our kids play together, which was so funny at times we were almost in tears from laughing!

My adorable craft was an ornament chandelier. I saw this idea on Pinterest (where else!) and it was originally posted from Bower Power. I chose to make this decoration because it looks stunning, but is so easy and inexpensive to make. It is pretty for Christmas and festive for New Year's. For my chandelier, I used 21 ornament balls and less than 1 roll of 9ft ribbon. You may want to use more or less of each depending on your ceiling height and how close the chandelier will be to your table, if it is hanging over a table. I bought 2 sets of shatterproof ornaments in small and large size from Walmart. They were each $4.95. The ones that have the design on them are glass and were $6 from Target. Since I only used half of the ornaments from each set from Walmart and I already had the ribbon, I say this chandelier cost me $10.95.

Here's how I made mine:
  • Cut 4 pieces of ribbon. The first piece being 19in., the second piece 16in., the third piece 13in., and the fourth piece 9in. These can be longer or shorter depending on how long you want yours.
  • Fold each ribbon in half and slide the ornaments down one side of the ribbon. 
  • I don't know that it matters, but I alternated the big and small ornaments and started with 4 ornaments on each ribbon. 
  • Then, I held the ribbons up all together to see how they looked and I added a few more ornaments wherever there were naked spots.
  • When I was satisfied with the way it looked, I tied each ribbon to my light fixture.


  • Creating this beautiful little decoration: 


 The best part about this project is that you can do any style or color ornament to match your holiday decor. In fact, as soon as I put mine up I decided I'm going to take it back down and add red ornaments. Well, I will take it down after New Year's and add the red ornaments in time for next Christmas!

Thank you, Kara, for hosting our wonderful craft day and helping me!

Merry Christmas, Party People!!

{FUN FACT} DID YOU KNOW...
Research suggests that decorations on a home's exterior make other people think you're more sociable and perhaps more integrated with the community and with its social activities.

Sunday, December 18, 2011

Supper Sunday- Pot Roast

Every Sunday we try to have a hearty, delicious home- cooked meal; hence Supper Sunday. This may be one of the few dinners during the week that I enforce the "if you don't eat what I cooked, you eat nothing at all" rule to Luke, since I know he would actually love it- if he would just take a freaking bite and try it!! Also, I LOVE doing a meal one night that I can turn into leftovers and completely different meals for the next couple of nights to come. My mom calls it frugal. I call it smart ;)

The recipe I am going to share with you for tonight's dinner is what I think of as a classic pot roast.  From the time it begins to cook, the roast makes the entire house smell so delicious. I'll make a roast year round, but nothing is better than cooking one during the winter when you can hang around the house in comfy clothes and enjoy the wonderful smell all day.


This is the way that my mom has prepared a roast for us for as long as I can remember, and it's the only way I cook one now. Not only is it beautiful, but it is sooo good and equally as easy. My mom has always done hers in the oven, but for some reason, I prefer to cook my roast in the crock pot.

Ingredients:
3- 4lb boneless pot roast- You can pick whichever cut you prefer the most based on tenderness, juiciness, etc., but I usually get a chuck roast or eye of round roast... Depending on what my local grocery store has on sale.
1 packet of Lipton Recipe Secrets Onion Soup & Dip Mix
4 large carrots- peeled & cut into rectangular pieces
4 large regular or red skinned potatoes- I skin the regular potatoes, but only clean the red skin potatoes, and quarter them both

Directions:
Put the roast in the crock pot and evenly cover the roast with the Lipton Soup Mix
Add water half way up the sides of the roast
Add potatoes and carrots around sides of the roast
Cover and cook on high for 4- 5 hours. If your dinner will be cooking all day while you're gone, set your crock pot on the low setting. The idea is that the roast is done cooking when it reaches 160ish degrees, so you can just set your crock pot on warm after the roast reached that temperature.
If the veggies aren't tender and cooked all the way by the time the roast is done, I put the veggies and the broth from the roast in a pan on the stove top and boil them for about 10 minutes. My mom would definitely use the broth to make a gravy, and serve over white bread and the veggies, but we nix the gravy in the name of staying healthy.

ps: Here is a dirty, embarrassing little secret- I dip my roast in ketchup (shriek!) because it adds the perfect twang. Mmmm!


Leftovers:
My absolute favorite part of making a roast are the next few lunches and dinners that follow. All you do is cut your left over roast so that it is shredded or into chunks and put it on your bread and *voila* you have delicious roast beef sandwiches! You can use mayo, lettuce, tomatoes, mustard, cheese, heat it up or eat it cold. Your options are endless!

Thank you for spending part of your Sunday with me. From my kitchen to yours, I hope you love this meal as much as I do :)  

{FUN FACT} Did you know...
Leftover Snickers bars from Halloween make a delicious dessert. Simply chop them up in the food processor. Peel, core and slice a few apples. Put the apples in a baking dish and sprinkle the chopped candy bars over the apples. Bake at 350 for 15 minutes. Serve alone with vanilla ice cream. Yum!!!


Thursday, December 15, 2011

Work It Wednesday

(a day late:))

Get those running shoes out and dusted off and a good run mix on your Ipod because you will be needing them this week! After a motivating conversation with my sweet childhood friend, Renuka, I decided to try something different this week... Rather than 5 days of cardio & weight training, I challenge you to run at least 1 mile per day for 7 days. Wait. Whaaaaa?? I know you have work, school or you might be on vacation, but this takes up so little of your time (10ish minutes) and you will be so happy you did it.


I used to despise running more than anyone up until earlier this year. After I broke my ankle, and was unable to exercise, I learned I was taking my perfectly working and healthy body for granted. I realized I owe it to myself to make running a habit. Not only for weight loss and staying fit benefits, but also for the long list (don't ask my husband about this list if you have anywhere to be) of benefits we don't see. Keeping our sweet little hearts healthy and strong being number 1 on that list.  

Let's face it- we are all more busy than usual right now during the holidays, and we may not be sticking to our workout & eating well regime like we promised ourselves we would. I know you've thought in your head that this year will be different- you're not going to eat as much, you won't drink as much wine and you will workout more. Don't tell me I'm alone here, people! It is SO important to squeeze in a little workout at least 4 days a week. I am giving you this 7 day challenge because I just did it and I lost 4lbs!! You may not lose 4lbs, but even if you shave seconds off your time, that is an accomplishment.

As always, good luck and have fun and I can't wait to hear your results! Ladies and Gentlemen, start your engines!!


Thursday, November 10, 2011

Five Days of Hurting so Good

Before I got pregnant with Luke there was nothing I could do to gain weight. I was in my early 20s. I ate whatever I wanted whenever I wanted, and exercised minimally. That all came to a screeching halt once I was incubating my first born. I gained 45 pounds during my pregnancy with Luke. I like to blame all the women who told me "Eat whatever you want" "It will fall right off" "You're eating for 2". It does most certainly not fall right off and you are not eating for 2. I lost most of the weight I gained before I started a medication that caused my appetite to increase and I gained the weight back immediately. My pregnancy with Ava was a different story. I only gained 25 pounds, but I started that pregnancy at 153lbs and weighed a whopping 178lbs when I have birth. I am a short 5'3" and every pound counts! More importantly than my weight at that time, I felt horrible. I had no energy and I got winded very easily. As with most women who have a baby, the first 20lbs came off immediately. The rest of the weight I have lost (52lbs- 3 more to go!) took a bittersweet injury to kick me into gear.

One gorgeous, sunny January morning in Arizona, my family and I were hiking the White Tanks. We were on our way down the mountain, which is an accomplishment in itself since it takes so long to get a 3 year old UP the mountain! Ava was in her carrier strapped to the front of me, and after several times of Luke stopping to smell the proverbial roses, Johnny finally put him on his shoulders to quicken the trip down. We were almost to the end of the hike when I experienced a life changing event~ Not to be dramatic, but I twisted my ankle and plunged to my death. Haha okay it wasn't that bad, but I did fall and break my right ankle. Thank God Ava was absolutely fine and got carried away without a scratch.

When I broke my ankle, I was a slave to my couch and my bed. Yes, it was only for 4 days but I was not able to sit still longer than that because suddenly I couldn't stand to ask my husband for one more glass of water or tell him how to do the laundry one more time.  I am a SAHM, and it was driving me mad not being able to be productive. For the next several weeks I was hobbling around my house living out the grieving process. I was sad, mad, depressed, etc. When I was healthy and mobile again, I realized I developed this amazing gratitude for being able to walk, run, or to just be able to move, for crying out loud, that I would have never known before I broke my ankle. I was more motivated than ever to lose weight and build a strong, healthy body. As soon I got clearance from my doctor, I began exercising and I haven't stopped since!

I decided I need to blog about exercising and eating right because I want to motivate people who are in similar situations as me or the situation I used to be in, and are looking for a way out. I am not on a diet. This is a life change. Living a healthy lifestyle is easy if you want it bad enough, and only if you want it bad enough. Johnny and I have not had a gym membership in years. We only workout at home and use minimal equipment that we have acquired over the years. Our kids are present during all of our workouts, which means we have many interruptions, but still complete our workouts in a short matter of time. Some of our workouts have inspiration from Crossfit  (I mean have you seen the men in the Crossfit competitions??) and we modify them based on the limited equipment and time we have. Each week I am going to give a free five day exercise plan that will simply consist of what we did. You can modify the workouts by changing the amount of reps or weight.

Thanks to Pinterest I discovered Rock my Run which is a website with countless run mixes made by DJs that you can download for FREE! They have mixes based on the type of music you want to listen to and the length of time you're planning on jamming out.

Oh and by the way,


Here are your Five Days of Hurting so Good:
Day 1:
Super Set for 5 sets from Crossfit: 30 wall balls with a 10lb medicine ball and
                                                       overhead dumbbell walks total 40 meters with 30lbs(15lb dumbbells in each hand)
Then~
Circuit for 2 sets: 30 supermans,
                             20 hanging leg raises (using gymnastic rings), and
                             20 shrugs with 30lbs (15lb dumbbells in each hand)
*This entire workout took 30 minutes to complete

Day2:
1.2 mile run~ 11 minutes
                       Music courtesy of Rock my Run - I listened to the I-Wanna-Go mix
Super Set for 4 sets: Dumbbell dead lifts with 20lb weights
                                 10 push- ups on gymnastic rings
Super Set for 3 sets: Chest flys with low resistance band (20 reps)
                                 Single leg calf raises on the step in the garage (20 reps each leg)
2 sets of hammer fist punches on the heavy bag for 60 seconds
*This workout took 1 hour to complete

Day 3:
1 mile run~ 9 minutes, 3 seconds
                    Music courtesy of Rock my Run
SS for 5 sets from Crossfit: 35 jump ropes and
                                            Dumbbell snatches with 10lb dumbbells
*This workout took 20 minutes to complete


Day 4:
1.2 mile run~ 11 minutes
                       Music courtesy of Rock my Run
This is my walking lunges workout. I do a total of 160 walking lunges holding 15lb dumbbells. I will either do this workout in my backyard, on the sidewalk in front of my house or inside all around the hallways in my house. I try to do this exercise once a week since lunges and squats are key to a nice butt and great legs. It goes something like this:
50 lunges, rest 60 seconds
40 lunges, rest 60 seconds
30 lunges, rest 60 seconds
20 lunges, rest 60 seconds
10 lunges, rest 60 seconds
When I first began doing this exercise, I didn't use any weights at all. When it started to get easier I added 10lb dumbbells, and now I'm using the 15lb dumbbells. This workout is hard but it only takes 20 minutes!

Day 5:
Just did some light cardio today. I pushed Luke in the stroller and had Ava on my back and we went for a 2 mile walk, which took 45 minutes.

Johnny and I are very passionate about exercising, and all comments and questions are welcome! Good luck and have fun! (Yes, I am aware that I sound like one of those annoying fitness people!)


Site Design by Designer Blogs